# Beginner's Guide to C++ and Bella Engine SDK
## Welcome
This comprehensive guide will take you from zero to rendering with the Bella Engine SDK. Whether you're building a plugin for a 3D application, creating a custom renderer, or implementing procedural textures, this guide provides practical examples and clear explanations.
**New to C++?** Don't worry! We'll introduce C++ concepts gradually as we encounter them, with clear explanations and practical examples. You'll learn both C++ and 3D rendering together.
**New to 3D rendering?** We start with the fundamentals and build up to advanced topics. Each concept is explained with working code you can run immediately.
## Getting Started
Before we dive into code, let's get your development environment ready. Understanding the build process from the beginning will save you hours of frustration later.
We'll use a simple, organized structure that works across all platforms for all the code examples:
```
learndir/ // Your learning workspace
├── bella_engine_sdk/ // The SDK (downloaded)
└── your_program.cpp // Your program
```
### Install C++ compiler
**MacOS**:
- Install Xcode and Command Line Tools (`xcode-select --install`)
**Ubuntu Linux**:
```
sudo apt-get install build-essential git curl -y
```
**Windows**:
- Download Visual Studio Community Edition 2022
- Run VisualStudioSetup.exe
- ✅ Desktop development with C++
- ✅ Git For Windows
### Install Bella SDK under learndir
**Linux/MacOS:** Open a terminal
```bash
mkdir learndir && cd learndir
curl -LO https://downloads.bellarender.com/bella_engine_sdk-25.3.0-linux.tar.gz
tar -xzf bella_engine_sdk-25.3.0-linux.tar.gz
```
**Windows:** Open a x64 Native Command Prompt for Visual Studio 2022
```bash
mkdir learndir && cd leanrdir
curl -LO https://downloads.bellarender.com/bella_engine_sdk-25.3.0-win32.zip
tar -xf bella_engine_sdk-25.3.0-win32.zip
```
## Scene with cam/light/geo/material to Bella render C++
Every 3D scene needs the same basic components. Here's what we're building:
```
🎬 Scene Structure (like a movie set):
World (xform) // The "stage" - root container
├── Camera Transform (xform) // Camera positioning system
│ └── Camera (camera) // The "camera" itself
│ ├── Lens (thinLens) // Camera lens properties
│ └── Sensor (sensor) // Film/digital sensor (required!)
├── Object Transforms (xform) // Object positioning systems
│ └── Geometry (sphere/disk) // The actual 3D shapes
└── Lighting (skyDome) // Scene lighting
```
> **💡 C++ Insight:** We'll build this step-by-step using classes and objects. Think of each component as a digital LEGO brick that we connect together.
## Understanding #include: Bringing Code Into Your Program
Before we look at our first program, let's understand those `#include` lines you see at the top of every C++ program.
**What is `#include`?** Think of it like importing tools into a workshop. You don't build a car by making every bolt and screw from scratch - you bring in pre-made parts and tools that others have already perfected.
**The Problem Without Includes:**
```cpp
// ❌ Without includes - you'd have to write EVERYTHING yourself
void logInfo(const char* message) {
// You'd have to write your own logging system from scratch!
// Hundreds of lines of code just to print a message...
}
class Engine {
// You'd have to write an entire 3D rendering engine from scratch!
// Thousands and thousands of lines of code...
};
```
**The Solution With Includes:**
```cpp
// ✅ With includes - use expertly crafted, tested code
#include "bella_engine_sdk/src/dl_core/dl_logging.h" // Now you can use logInfo()
#include "bella_engine_sdk/src/bella_sdk/bella_engine.h" // Now you can use Engine class
// Your code can focus on what YOU want to build, not reinventing the wheel
```
**Two Types of Includes:**
**Angle brackets `< >` - System/Standard Library:**
```cpp
#include // Standard C++ threading capabilities
#include // Standard C++ time operations
#include // Standard input/output (like printing to console)
```
**Quotes `" "` - Project-Specific Files:**
```cpp
#include "bella_engine_sdk/src/bella_sdk/bella_engine.h" // Bella's rendering engine
#include "bella_engine_sdk/src/dl_core/dl_logging.h" // Bella's logging system
```
**What Happens During Compilation:**
1. **Preprocessor runs first:** Finds all `#include` statements
2. **File insertion:** Literally copies the contents of included files into your program
3. **Compilation:** The combined code gets compiled into machine code
> **💡 Key Insight:** `#include` doesn't "link" to other code - it physically copies that code into your program before compilation. It's like copy-pasting thousands of lines of expert code at the top of your file!
**jump_right_in.cpp** - Now let's look at our first program. Notice how we include exactly what we need:
```c++
#include "bella_engine_sdk/src/bella_sdk/bella_engine.h" // Core rendering engine
#include "bella_engine_sdk/src/bella_sdk/bella_scene.h" // Scene management
#include "bella_engine_sdk/src/dl_core/dl_logging.h" // Logging utilities
#include // For std::this_thread (C++ standard library)
#include // For timing operations (C++ standard library)
// ============================================================================
// 🔍 C++ Concept: Observer Pattern
// This lets us "listen" for events from the rendering engine.
// When something happens (rendering starts, progress updates, etc.),
// our functions get called automatically.
// ============================================================================
struct MyEngineObserver : public dl::bella_sdk::EngineObserver {
// 🔔 Called when rendering begins
void onStarted(dl::String pass) override {
dl::logInfo("🚀 Rendering started: %s", pass.buf());
}
// 🔔 Called repeatedly as rendering progresses (0.0 to 1.0)
void onProgress(dl::String pass, dl::bella_sdk::Progress progress) override {
dl::logInfo("⏳ Progress: %.1f%% - %s",
progress.progress() * 100.0, progress.toString().buf());
}
// 🔔 Called when we get the final rendered image
void onImage(dl::String pass, dl::bella_sdk::Image image) override {
dl::logInfo("🖼️ Got image: %dx%d pixels", image.width(), image.height());
}
// 🔔 Called when rendering finishes
void onStopped(dl::String pass) override {
dl::logInfo("✅ Rendering complete: %s", pass.buf());
}
};
// ============================================================================
// 🎬 Main Function: Building Our 3D Scene
// ============================================================================
int main() {
// Step 1: Create the rendering engine and scene
dl::bella_sdk::Engine engine; // The renderer itself
dl::bella_sdk::Scene scene = engine.scene(); // Container for all our objects
scene.loadDefs(); // Load built-in object types
// Get the "world" - this is the root of our scene tree
dl::bella_sdk::Node world = scene.world();
// ========================================================================
// 📷 Step 2: Create the Camera System
// Every camera needs: sensor (film) + lens + positioning
// ========================================================================
// Create a digital "film" sensor (30mm x 30mm)
dl::bella_sdk::Node sensor = scene.createNode("sensor");
sensor["size"] = dl::Vec2::make(30.0, 30.0);
// Create a simple lens (like a magnifying glass)
auto lens = scene.createNode("thinLens"); // 'auto' = let C++ figure out the type
// Create camera positioning system + the camera itself
auto cameraXform = scene.createNode("xform"); // Transform = position/rotation
cameraXform.parentTo(world); // Attach to our world
auto camera = scene.createNode("camera"); // The actual camera
camera["resolution"] = dl::Vec2::make(320, 320); // 320x320 pixel image
camera["lens"] = lens; // Connect our lens
camera["sensor"] = sensor; // Connect our sensor
camera.parentTo(cameraXform); // Put camera in the positioning system
// Tell the scene to use this camera for rendering
auto settings = scene.settings();
settings["camera"] = camera;
// ========================================================================
// ☀️ Step 3: Add Lighting
// ========================================================================
auto skyDome = scene.createNode("skyDome"); // Simulates sky lighting
skyDome.parentTo(world);
settings["environment"] = skyDome; // Use this for scene lighting
// ========================================================================
// 🎨 Step 4: Create Materials (like paint or metal finishes)
// ========================================================================
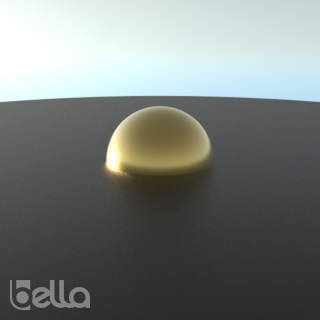
// Golden metal material for our sphere
auto sphereMaterial = scene.createNode("conductor"); // Metal material
sphereMaterial["reflectance"] = dl::Rgba::make(0.8, 0.6, 0.2, 1.0); // Golden color (R,G,B,Alpha)
sphereMaterial["roughness"] = 26.1; // Slightly rough surface
// Glass-like material for the ground
auto groundMaterial = scene.createNode("dielectric"); // Glass/plastic material
groundMaterial["roughness"] = dl::Real(41.0); // Rough surface
// ========================================================================
// 🏀 Step 5: Create Objects (Sphere + Ground)
// ========================================================================
// Golden sphere in the center
auto sphereXform = scene.createNode("xform"); // Position controller for sphere
sphereXform["material"] = sphereMaterial; // Apply golden material
sphereXform.parentTo(world); // Add to scene
auto sphere = scene.createNode("sphere"); // The actual sphere shape
sphere["radius"] = dl::Real(1.0); // 1 unit radius
sphere.parentTo(sphereXform); // Put sphere in its position controller
// Large disk as ground plane
auto groundXform = scene.createNode("xform"); // Position controller for ground
groundXform["name"] = dl::String("groundXform"); // Give it a name (optional)
groundXform["material"] = groundMaterial; // Apply glass material
groundXform.parentTo(world); // Add to scene
auto ground = scene.createNode("disk"); // Flat circular disk
ground["radius"] = 10.0; // Large radius (10 units)
ground.parentTo(groundXform); // Put ground in its position controller
// ========================================================================
// 🎥 Step 6: Setup Rendering (what/where to save)
// ========================================================================
auto beautyPass = scene.createNode("beautyPass"); // Defines what to render
beautyPass["saveImage"] = true; // Save the image to disk
beautyPass["outputName"] = "jump_right_in"; // Filename (will be my_render.png)
auto outputImagePath = scene.createNode("outputImagePath"); // Where to save
outputImagePath["dir"] = "."; // Current directory
beautyPass["overridePath"] = outputImagePath; // Connect save location
settings["beautyPass"] = beautyPass; // Tell scene to use this render setup
// ========================================================================
// 📱 Step 7: Connect Our Observer + Position Camera
// ========================================================================
MyEngineObserver observer; // Create our notification listener
engine.subscribe(&observer); // Connect it to the engine
// Position camera to look at the scene (like framing a photo)
dl::bella_sdk::zoomExtents(
scene.cameraPath(), // Camera's position controller (not camera itself!)
dl::Vec3{0,0,0}, // Look at the origin (center of sphere)
3.0 // Distance from center
);
// Tilt camera down 75 degrees (like looking down from above)
dl::bella_sdk::orbitCamera(scene.cameraPath(), dl::Vec2{0.0, -75.0});
// ========================================================================
// 🚀 Step 8: Render!
// ========================================================================
engine.start(); // Begin rendering
// Wait for rendering to complete (check every 100ms)
while(engine.rendering()) {
std::this_thread::sleep_for(std::chrono::milliseconds(100));
}
engine.stop(); // Clean shutdown
engine.unsubscribe(&observer); // Disconnect our listener
return 0; // Tell operating system: "Success!"
}
```
### Build and Run jump_right_in.cpp
Make sure you paste the C++ code into a file called jump_right_in.cpp that is in a directory called learndir and the bella_engine_sdk is in the same directory.
Now let's compile and run this program!
> **💡 C++ Learning Moment:** C++ is a compiled language, meaning we transform our human-readable source code into machine code that the computer can execute directly. This is different from interpreted languages like Python.
**Linux & MacOS:** Make sure your terminal is in learndir
```bash
# Compile the program (one long line)
g++ -std=c++14 -DNDEBUG \
-Ibella_engine_sdk/src \
-Lbella_engine_sdk/lib \
-Wl,-rpath,bella_engine_sdk/lib \
jump_right_in.cpp \
-lbella_engine_sdk \
-o jump_right_in
# Run the program
./jump_right_in
```
**Windows**: Make sure x64 Native Command Prompt for Visual Studio 2022 is in learndir
```cmd
REM Compile the program
cl /std:c++14 /DNDEBUG /Ibella_engine_sdk\src /EHsc jump_right_in.cpp ^
/link /LIBPATH:bella_engine_sdk\lib bella_engine_sdk.lib /OUT:jump_right_in.exe
REM Set up library path and run
set PATH=%PATH%;bella_engine_sdk\lib
jump_right_in.exe
```
> **🔍 Build Command Breakdown:**
> - `-std=c++14`: Use C++14 language standard
> - `-Ibella_engine_sdk/src`: Tell compiler where to find header files
> - `-Lbella_engine_sdk/lib`: Tell linker where to find libraries
> - `-lbella_engine_sdk`: Link against the Bella library
> - `-o jump_right_in`: Name the output executable "jump_right_in"
**What you should see:**
```
🚀 Rendering started: beauty
⏳ Progress: 15.2% - Rendering...
⏳ Progress: 47.8% - Rendering...
⏳ Progress: 82.1% - Rendering...
🖼️ Got image: 320x320 pixels
✅ Rendering complete: beauty
```
Look for **jump_right_in.png** in your directory
 ## What You Just Learned
Congratulations! You've successfully created and rendered your first 3D scene. Here are the core concepts you now understand:
### 🎯 Bella SDK Concepts
- **Engine**: The rendering powerhouse that creates your images
- **Scene**: Container for all objects and their relationships
- **Nodes**: Individual objects (sphere, disk, materials, camera, etc.)
- **Attributes**: Properties accessed with `node["property"]` syntax
- **Hierarchy**: Objects connected in a tree structure using `parentTo()`
- **Observers**: Event listeners that notify you of rendering progress
### 🔧 C++ Concepts You Used
- **Classes and Objects**: `Engine`, `Scene`, `Node` are all classes
- **Methods**: Functions belonging to objects (like `scene.createNode()`)
- **Auto keyword**: Let the compiler figure out complex types
- **Namespaces**: `dl::bella_sdk::` keeps names organized
- **Inheritance**: `MyEngineObserver` extends `EngineObserver`
- **Overriding**: Custom behavior for `onStarted()`, `onProgress()`, etc.
> **💪 C++ Strength Building:** We're using modern C++ features like `auto` and uniform initialization `{}` to write cleaner code while learning the fundamentals.
## C++ Philosophy for This Guide
This guide follows specific principles to help you become a confident C++ developer:
### ✅ What We Do:
- **Start Simple**: Command-line tools before fancy IDEs
- **Cross-Platform**: Same code works on Linux, MacOS, and Windows
- **Explicit Types First**: Show `dl::bella_sdk::Node` before using `auto`
- **Copy-Paste Ready**: All examples work immediately
- **Gradual Complexity**: Each example builds on the previous
### ❌ What We Avoid:
- **using namespace**: You should always know if you're using std:: or dl::
- **Hidden Complexity**: No magic - we show every step
- **Platform-Specific**: Code that only works on one system
## The Foundation - DL Core Library
Before diving deeper into rendering, let's understand the foundation. The `dl_core` library provides essential utilities that make working with 3D math and data structures easier.
> **🧠 Why Learn This?** Understanding these core types will make you much more effective with the Bella SDK. Plus, these patterns appear in most professional 3D and game development libraries.
**dl_core_basics.cpp**
```text
#include "bella_engine_sdk/src/dl_core/dl_string.h" // Smart strings
#include "bella_engine_sdk/src/dl_core/dl_vector.h" // Dynamic arrays
#include "bella_engine_sdk/src/dl_core/dl_math.h" // 3D math types
#include
int main() {
// ====================================================================
// 📝 Strings: Immutable and Reference-Counted
// ====================================================================
dl::String name = "MyNode"; // Create a string
dl::String fullPath = name + "_001"; // Concatenation works naturally
// ====================================================================
// 📊 Dynamic Arrays: Like std::vector but with math operations
// ====================================================================
dl::ds::Vector values = {1.0, 2.0, 3.0}; // Initialize with list
values.push_back(4.0); // Add element
// ====================================================================
// 🧮 3D Math Types: The Heart of 3D Programming
// ====================================================================
// 3D points and vectors - notice the beautiful brace initialization!
dl::Vec3 position{1.0, 2.0, 3.0}; // A point in 3D space
dl::Vec3 direction{0.0, 0.0, 1.0}; // A direction vector (forward)
dl::Vec3 newPos = position + direction * 2.0; // Move 2 units forward
// Colors with transparency (Red, Green, Blue, Alpha)
dl::Rgba red{1.0, 0.0, 0.0, 1.0}; // Fully opaque red
dl::Rgba transparent = red; // Copy the red
transparent.a = 0.5; // Make it 50% transparent
// ====================================================================
// 🔄 Transformation Matrices: How We Move Things in 3D
// ====================================================================
auto translation = dl::Mat4::makeTranslation(10.0, 0.0, 0.0); // Move right 10 units
dl::Mat4 rotation = dl::Mat4::makeRotationZ(dl::math::nc::pi / 4); // Rotate 45 degrees
dl::Mat4 transform = translation * rotation; // Combine: move then rotate
// ====================================================================
// 📤 Output Results (using .buf() to get C-style string from dl::String)
// ====================================================================
std::cout << "String result: " << fullPath.buf() << std::endl;
std::cout << "Array has " << values.size() << " elements" << std::endl;
std::cout << "New position: {" << newPos.x << ", " << newPos.y << ", " << newPos.z << "}" << std::endl;
std::cout << "Red color: {" << red.r << ", " << red.g << ", " << red.b << ", " << red.a << "}" << std::endl;
return 0;
}
```
### 🎯 C++ Magic: Uniform Initialization with `{}`
See those curly braces `{1.0, 2.0, 3.0}`? That's **uniform initialization** - one of C++11's best features!
#### Before C++11 (the inconsistent mess):
**Problem 1: Different syntax for different things**
```cpp
int x = 5; // Copy initialization
int y(5); // Direct initialization
int z = int(5); // Functional cast
int arr[] = {1, 2, 3}; // Array needs = and {}
std::vector vec; // Can't initialize with values!
```
**Problem 2: The "Most Vexing Parse" - is this a function or variable?**
```cpp
Widget w1(); // Oops! This declares a FUNCTION, not a Widget object
Widget w2; // OK, but can't pass constructor args
Widget w3(10); // OK if constructor takes int
Widget w4(Widget(10)); // ERROR! Compiler thinks this is a function declaration
```
**Problem 3: Narrowing conversions silently lose data**
```cpp
int bad = 3.14; // Silently becomes 3, losing 0.14
char overflow = 300; // Silently overflows (300 > 127)
```
**Problem 4: Containers were painful to initialize**
```cpp
std::vector v;
v.push_back(1);
v.push_back(2);
v.push_back(3); // Really? 3 lines for 3 numbers?
```
**Problem 5: No way to initialize class members in-place**
```cpp
class Scene {
std::vector nodes; // Can't give it initial values here
Matrix4 transform; // Hope default constructor is what you want!
};
```
#### With uniform initialization (everything just works):
**Solution: One syntax for EVERYTHING**
```cpp
int x{5}; // Works
Widget w{10}; // Works (no ambiguity!)
int arr[]{1, 2, 3}; // Works
std::vector vec{1, 2, 3}; // Works (finally!)
```
**No more "Most Vexing Parse"**
```cpp
Widget w1{}; // Empty braces = default construct
Widget w2{10}; // Pass arguments
Widget w3{Widget{10}}; // Even this works!
```
**Narrowing conversions are ERRORS**
```cpp
int safe{3.14}; // COMPILE ERROR - won't lose data
char no_overflow{300}; // COMPILE ERROR - prevents bugs
```
**Containers initialize naturally**
```cpp
std::vector v{1, 2, 3}; // One beautiful line
std::map m{{"a", 1}, {"b", 2}}; // Even nested!
```
**Initialize members right in the class**
```cpp
class Scene {
std::vector nodes{}; // Start with empty vector
Matrix4 transform{1,0,0,0, // Identity matrix right here!
0,1,0,0,
0,0,1,0,
0,0,0,1};
};
```
#### The killer feature - it catches bugs at compile time:
**Old way - these bugs compile but crash/corrupt at runtime**
```cpp
void processArray(int arr[10]) { /* ... */ }
int small[3] = {1, 2, 3};
processArray(small); // CRASH! But compiles fine
double pi = 3.14159;
int bad_pi = pi; // Silently becomes 3
float* oops = pi; // Compiles on some compilers!
```
**New way - bugs caught at compile time**
```cpp
std::array arr{1,2,3}; // Size is part of type
int good_pi{pi}; // ERROR: narrowing conversion
float* correct{pi}; // ERROR: can't convert double to pointer
```
**Why it's awesome:**
- 🎯 **One syntax for everything** - no more remembering different rules
- 🛡️ **Prevents silent bugs** - narrowing conversions become compile errors
- 🚀 **Fixes parsing ambiguities** - no more "Most Vexing Parse"
- 📖 **Super readable** - `{}` always means "initialize this"
- ✨ **Works everywhere** - variables, arrays, containers, member initialization
**Pro tip:** When in doubt, use `{}` - it's safer and clearer than any alternative!
## Building Your First Scene: Uniform Initialization in Action
Now let's use those types to build something real - a Bella scene that we can save and load! This example shows uniform initialization working in a practical 3D context.
**build_scene.cpp**
```c++
#include "bella_engine_sdk/src/bella_sdk/bella_scene.h"
#include "bella_engine_sdk/src/dl_core/dl_logging.h"
int main() {
// Create scene and load node definitions
dl::bella_sdk::Scene scene;
scene.loadDefs();
dl::bella_sdk::Node world = scene.world();
// ====================================================================
// 🎨 Create Materials with Uniform Initialization
// ====================================================================
// Shiny metal material - notice the clean {} syntax
auto metalMaterial = scene.createNode("conductor");
metalMaterial["reflectance"] = dl::Rgba{0.9, 0.7, 0.1, 1.0}; // Golden color
metalMaterial["roughness"] = dl::Real{15.0}; // Fairly smooth
// Matte plastic material
auto plasticMaterial = scene.createNode("dielectric");
plasticMaterial["color"] = dl::Rgba{0.2, 0.8, 0.3, 1.0}; // Green plastic
plasticMaterial["roughness"] = dl::Real{85.0}; // Rough surface
// ====================================================================
// 🏀 Create Spheres at Different Positions
// ====================================================================
// Metal sphere on the left - using transformation matrices
auto leftSphereXform = scene.createNode("xform");
leftSphereXform["material"] = metalMaterial;
leftSphereXform.parentTo(world);
// Create translation matrix
dl::Mat4 leftTransform = dl::Mat4::makeTranslation(-2.0, 0.0, 0.0); // STATIC METHOD: called on class name
leftSphereXform["steps"][0]["xform"] = leftTransform;
auto leftSphere = scene.createNode("sphere");
leftSphere["radius"] = dl::Real{1.0};
leftSphere.parentTo(leftSphereXform); // INSTANCE METHOD: called on specific object
// Plastic sphere on the right
auto rightSphereXform = scene.createNode("xform");
rightSphereXform["material"] = plasticMaterial;
rightSphereXform.parentTo(world);
// Different transformation - combining translation and scaling
dl::Mat4 translation = dl::Mat4::makeTranslation(2.0, 0.0, 0.0); // Move right 2 units
dl::Mat4 scaling = dl::Mat4::makeScale(1.5, 1.5, 1.5); // Make 50% bigger
dl::Mat4 rightTransform = translation * scaling; // Combine transformations
rightSphereXform["steps"][0]["xform"] = rightTransform;
auto rightSphere = scene.createNode("sphere");
rightSphere["radius"] = dl::Real{1.0}; // Same base size, but transform scales it
rightSphere.parentTo(rightSphereXform);
// ====================================================================
// 🏛️ Create Ground Plane
// ====================================================================
auto groundMaterial = scene.createNode("dielectric");
groundMaterial["tranmittance"] = dl::Rgba{0.8, 0.8, 0.8, 1.0}; // Light gray
groundMaterial["roughness"] = dl::Real{45.0};
auto groundXform = scene.createNode("xform");
groundXform["material"] = groundMaterial;
groundXform.parentTo(world);
// Position ground plane below the spheres
dl::Mat4 groundTransform = dl::Mat4::makeTranslation(0.0, 0.0, -1.0); // Move down 1 unit
groundXform["steps"][0]["xform"] = groundTransform;
auto ground = scene.createNode("disk");
ground["radius"] = dl::Real{8.0}; // Large ground plane
ground.parentTo(groundXform);
// ====================================================================
// 💾 Save Scene to File
// ====================================================================
scene.write("two_spheres_scene.bsa");
dl::logInfo("✅ Scene saved as 'two_spheres_scene.bsa'");
dl::logInfo("📊 Scene contains:");
dl::logInfo(" - Golden metal sphere (left side)");
dl::logInfo(" - Green plastic sphere (right side, 1.5x larger)");
dl::logInfo(" - Gray ground plane");
dl::logInfo("💡 Import this .bsa file into Bella GUI to render it!");
dl::logInfo("💡 This scene only creates the geometry, so without lights and cameras it will look black.");
dl::logInfo("💡 You can add lights and cameras to the scene in the GUI, or as we mentioned earlier, by importing the .bsa");
dl::logInfo("💡 When you do a File New in Bella GUI, you get a default scene with a camera and a light.");
dl::logInfo("💡 Hit the IPR to render the scene, and hit the E key to zoom out.");
return 0;
}
```
**Build and run:**
```bash
# Linux/macOS
g++ -std=c++14 -DNDEBUG -Ibella_engine_sdk/src -Lbella_engine_sdk/lib -Wl,-rpath,bella_engine_sdk/lib build_scene.cpp -lbella_engine_sdk -o build_scene
./build_scene
# Windows
cl /std:c++14 /DNDEBUG /Ibella_engine_sdk\src /EHsc build_scene.cpp /link /LIBPATH:bella_engine_sdk\lib bella_engine_sdk.lib /OUT:build_scene.exe
build_scene.exe
```
**What you should see:**
```
✅ Scene saved as 'two_spheres_scene.bsa'
📊 Scene contains:
- Golden metal sphere (left side)
- Green plastic sphere (right side, 1.5x larger)
- Gray ground plane
💡 Import this .bsa file into Bella GUI to render it!
```
### Static vs Instance Method Calls
You probably noticed two different ways of calling methods in the code above:
**Static Method Call:**
```cpp
dl::Mat4::makeTranslation(-2.0, 0.0, 0.0) // Called on CLASS name (Mat4)
```
- Uses the **class name** (`Mat4`) followed by `::`
- No object needed - the method belongs to the class itself
- Like a utility function organized under the class name
- Common for creating new objects or doing calculations that don't need specific object data
**Instance Method Call:**
```cpp
leftSphere.parentTo(leftSphereXform) // Called on SPECIFIC OBJECT (leftSphere)
```
- Uses a **specific object** (`leftSphere`) followed by `.`
- The method operates on that particular object's data
- Most methods you'll use are instance methods
- They modify or use the data inside that specific object
**Think of it like:**
- **Static method:** "Hey Mat4 class, make me a translation matrix"
- **Instance method:** "Hey leftSphere object, parent yourself to this transform"
> **💡 Quick Rule:** If you see `ClassName::methodName()` it's static. If you see `objectName.methodName()` it's instance.
### Key Concepts Demonstrated
**🎯 Uniform Initialization in Practice:**
- `dl::Rgba{0.9, 0.7, 0.1, 1.0}` - Clean color specification using `{}`
- `dl::Real{15.0}` - Consistent numeric types using `{}`
- `dl::Mat4::makeScale(1.5, 1.5, 1.5)` - Factory methods with clear parameters (not uniform initialization, but clean syntax)
**🔄 Matrix Mathematics:**
- **Translation matrices:** Moving objects in 3D space
- **Scale matrices:** Changing object size
- **Matrix multiplication:** Combining transformations (`translation * scaling`)
**🏗️ Scene Organization:**
- **Materials:** Define surface properties (metal vs plastic)
- **Transforms:** Control object positioning and scaling
- **Geometry:** The actual 3D shapes
- **Hierarchy:** Everything properly parented to build a scene graph
> **💡 Real-World Usage:** This pattern (create materials, create transforms, apply materials to transforms, add geometry) is the foundation of all 3D scene construction. You're learning the core workflow used in every 3D application!
## Understanding Types in C++: Memory, Performance, and Safety
Types in C++ aren't just labels - they're fundamental to how your program uses memory and performs. This is especially critical in 3D rendering where you're processing millions of vertices, pixels, and transformations.
### Types Control Memory Layout
Every type defines exactly how much memory it uses and how that memory is organized:
```cpp
// Built-in types - precise memory footprint
int count = 42; // Exactly 4 bytes
float precision = 3.14f; // Exactly 4 bytes
double bigPrecision = 3.14; // Exactly 8 bytes
bool flag = true; // Usually 1 byte
// 3D types - optimized memory layout
dl::Vec3 position{1.0, 2.0, 3.0}; // 3 × 8 bytes = 24 bytes, packed tight
dl::Vec4 homogeneous{1,2,3,1}; // 4 × 8 bytes = 32 bytes, aligned for SIMD
dl::Mat4 transform = /* ... */; // 16 × 8 bytes = 128 bytes, column-major
```
> **⚡ Performance Insight:** `Vec4` uses 32 bytes instead of 24 because modern CPUs can process 4 floats simultaneously (SIMD). The "wasted" 8 bytes actually makes math operations much faster.
### Stack vs Heap: Where Your Data Lives
C++ gives you control over where data is stored in memory, which dramatically affects performance. Understanding this is crucial for writing efficient 3D applications.
**What are the Stack and Heap?** They're two different areas of your computer's memory (RAM) where your program can store data, each with different characteristics.
**The Stack - Fast and Automatic:**
Think of the stack like a cafeteria tray stack - you can only add or remove trays from the top. It's extremely fast but limited in size.
```cpp
void someFunction() {
dl::Vec3 position{1, 2, 3}; // Created on stack when function starts
dl::Mat4 transform = /* ... */; // Also on stack
// When function ends, position and transform are automatically destroyed
// No memory management needed - it's automatic!
}
```
**Stack characteristics:**
- **Lightning fast:** Allocation is just moving a pointer
- **Automatic cleanup:** Variables destroyed when leaving scope (function ends, block ends)
- **Limited size:** Usually ~1-8MB total (varies by system)
- **LIFO order:** Last In, First Out (like the tray stack)
**The Heap - Flexible but Slower:**
Think of the heap like a huge warehouse where you can store boxes anywhere, but you need to keep track of where you put them.
```cpp
void someFunction() {
// Ask for space in the heap - slower, but you control the size
dl::Vec3* positions = new dl::Vec3[1000000]; // 1 million vectors!
// Use the data...
// YOU must clean up - the heap doesn't do it automatically
delete[] positions; // If you forget this = memory leak!
}
```
**Heap characteristics:**
- **Flexible size:** Can allocate huge amounts (limited by available RAM)
- **Manual management:** You must `delete` what you `new`
- **Slower access:** More complex allocation algorithm
- **Fragmentation:** Can become scattered over time, affecting performance
**Why This Matters for 3D Programming:**
```cpp
// ✅ Stack - perfect for small, temporary data
dl::Vec3 cameraPosition{0, 5, 10}; // 24 bytes - fits easily on stack
dl::Mat4 viewMatrix = camera.getView(); // 128 bytes - still fine for stack
// ❌ Stack - dangerous for large data
dl::Vec3 millionVertices[1000000]; // 24MB! Likely stack overflow crash
// ✅ Heap - perfect for large, dynamic data
auto vertices = std::make_unique(vertexCount); // Any size, automatic cleanup
```
**Stack allocation (fast, automatic cleanup):**
```cpp
dl::Vec3 cameraPos{0, 0, 5}; // Lives on stack - super fast access
dl::Mat4 viewMatrix = /* ... */; // Also stack - perfect for small, short-lived data
```
**Heap allocation (flexible but slower):**
```cpp
// When you need dynamic size or long lifetime
auto* vertices = new dl::Vec3[vertexCount]; // Heap - you control the size
// Don't forget: delete[] vertices; // Manual cleanup required!
```
### Why Strong Typing Prevents Expensive Mistakes
In 3D graphics, type mistakes aren't just bugs - they're performance killers:
```cpp
// ❌ EXPENSIVE MISTAKE: Wrong precision
float lowPrecision = 3.14159265359; // Loses precision, causes visual artifacts
double highPrecision = 3.14159265359; // Correct precision for math
// ❌ EXPENSIVE MISTAKE: Wrong vector size
dl::Vec3 position{1, 2, 3};
// someFunction(position); // Error if function expects Vec4!
// Would require expensive conversion: Vec4{position.x, position.y, position.z, 1.0}
// ✅ CORRECT: Right types from the start
dl::Vec4 homogeneousPos{1, 2, 3, 1}; // Ready for matrix multiplication
```
### Bella SDK's Type Philosophy
The Bella SDK uses types strategically for both safety and performance:
```cpp
dl::Real precision = 42.0; // Consistent precision across the SDK
dl::String name = "MyNode"; // Reference-counted, no accidental copies
dl::ds::Vector vertices; // Dynamic array optimized for 3D data
dl::Rgba color{0.8, 0.6, 0.2, 1.0}; // Exactly what GPU expects: 4 floats
```
> **🧠 Professional Insight:** In production 3D software, choosing the right types can mean the difference between 30 FPS and 60 FPS. The SDK's types are designed by experts who understand both the math and the hardware.
## Type Safety and Conversions
Now that you understand types, let's see how Bella's type system prevents errors while allowing natural conversions. This is crucial for 3D programming where you frequently convert between 2D/3D vectors and different coordinate systems.
> **🔒 C++ Safety:** Strong typing prevents bugs like accidentally using a 2D point where a 3D point is expected. But the SDK provides elegant ways to convert between types when needed.
**type_conversions.cpp**
```c++
#include "bella_engine_sdk/src/dl_core/dl_vector.h"
#include "bella_engine_sdk/src/dl_core/dl_math.h"
#include
int main() {
// ====================================================================
// 🔄 Type Conversions: The SDK gives you options!
// ====================================================================
// Start with a simple scalar (single number)
dl::Real scalar = 5.0;
// Create a 3D vector - uniform initialization makes this clean
dl::Vec3 vector = {scalar, scalar, scalar}; // {5.0, 5.0, 5.0}
// ====================================================================
// 📈 Vec3 to Vec4: Two approaches (both valid!)
// ====================================================================
// Method 1: Explicit type casting (tells compiler "I know what I'm doing")
dl::Vec4 vec4_cast = static_cast(vector);
// Method 2: Component construction (explicit about what goes where)
dl::Vec4 vec4_construct = {vector.x, vector.y, vector.z, 0.0};
// ====================================================================
// 🔢 Matrix Identity: The "do nothing" transformation
// ====================================================================
dl::Mat3 small = dl::Mat3::identity; // 3x3 identity matrix
dl::Mat4 large = dl::Mat4::identity; // 4x4 identity matrix
// ====================================================================
// 📉 Vec4 to Vec3: Dropping the 4th component
// ====================================================================
dl::Vec4 source = {1.0, 2.0, 3.0, 4.0};
// Method 1: Type casting (automatic - drops .w component)
dl::Vec3 result_cast = static_cast(source);
// Method 2: Manual component selection (explicit control)
dl::Vec3 result_construct = {source.x, source.y, source.z};
// ====================================================================
// 📤 Show the results
// ====================================================================
std::cout << "Scalar value: " << scalar << std::endl;
std::cout << "Vec3: {" << vector.x << ", " << vector.y << ", " << vector.z << "}" << std::endl;
std::cout << "Vec4 (cast): {" << vec4_cast.x << ", " << vec4_cast.y << ", " << vec4_cast.z << ", " << vec4_cast.w << "}" << std::endl;
std::cout << "Vec4 (construct): {" << vec4_construct.x << ", " << vec4_construct.y << ", " << vec4_construct.z << ", " << vec4_construct.w << "}" << std::endl;
std::cout << "Back to Vec3 (cast): {" << result_cast.x << ", " << result_cast.y << ", " << result_cast.z << "}" << std::endl;
std::cout << "Back to Vec3 (construct): {" << result_construct.x << ", " << result_construct.y << ", " << result_construct.z << "}" << std::endl;
return 0;
}
```
### Understanding Casting: When and Why to Convert Types
In 3D programming, you constantly need to convert between related types - like going from 3D to 2D coordinates, or between different precision levels. C++ gives you several ways to do this safely.
**What is casting?** It's telling the compiler "I want to convert this data from one type to another." Think of it like converting units: turning meters into feet, or Celsius into Fahrenheit.
**Why do we need it?** Different parts of your 3D pipeline expect different data formats:
- GPU shaders might want `Vec4` for matrix operations
- Screen coordinates need `Vec2` for 2D positioning
- File formats might require `float` instead of `double`
```cpp
// Common 3D casting scenarios
dl::Vec3 worldPos{100.0, 200.0, 50.0};
// Scenario 1: 3D world position → 2D screen position
dl::Vec2 screenPos{worldPos.x, worldPos.y}; // Manual component selection
// Scenario 2: Adding homogeneous coordinate for matrix math
dl::Vec4 homogeneousPos = static_cast(worldPos); // Automatic: adds w=1.0
// Scenario 3: Precision conversion for file export
float exportData = static_cast(worldPos.x); // double → float
```
**Two conversion strategies:**
**`static_cast<>()` - "Do the standard conversion"**
- Let the type system handle the conversion automatically
- Good when the conversion is well-defined and expected
- Example: `Vec3` → `Vec4` automatically sets `w=1.0`
**Component construction `{x, y, z}` - "I'll specify exactly what goes where"**
- You control every detail of the conversion
- Good when you need non-standard behavior
- Example: `Vec4{pos.x, pos.y, pos.z, 0.0}` for direction vectors (w=0.0, not 1.0)
> **💡 When to Use Each:**
> - Use `static_cast<>()` when the "default" conversion does what you want
> - Use `{component, construction}` when you need precise control over the result
> - When in doubt, component construction is more explicit and often clearer to read
## Working with Scenes and Nodes
### Creating Your First Scene
Now that you understand the core types, let's see how to build scenes step by step:
**scene_basics.cpp**
```c++
#include "bella_engine_sdk/src/bella_sdk/bella_scene.h"
#include "bella_engine_sdk/src/dl_core/dl_logging.h"
int main() {
// Step 1: Every scene needs node definitions first
dl::bella_sdk::Scene scene;
scene.loadDefs(); // Load built-in Bella node types (sphere, pbr, lights, etc.)
// Step 2: Now you can create nodes
dl::bella_sdk::Node sphere = scene.createNode("sphere"); // 3D sphere geometry
dl::bella_sdk::Node material = scene.createNode("pbr"); // Physically-based material
dl::bella_sdk::Node light = scene.createNode("physicalSky"); // Realistic sky lighting
// Step 3: Nodes have both a type and a unique auto-generated name
dl::logInfo("Created %s node named '%s'",
sphere.type().buf(), // The type: "sphere"
sphere.id().buf() // Auto-generated unique ID like "sphere_001"
);
return 0;
}
```
### The Scene Creation Lifecycle
Understanding the proper order of scene creation prevents frustrating errors and helps you write more reliable code.
**Why does order matter?** The Bella SDK uses something called the **factory pattern** - a common programming solution for creating objects.
**What's a "pattern" in programming?** Think of patterns like blueprints for solving common problems. Just like architects have standard ways to design kitchens or staircases, programmers have standard ways to solve problems like "how do I create different types of objects based on a string name?"
**The Factory Pattern Explained:**
The problem: How do you create different objects when you don't know what type you need until runtime?
**Scenario:** You're loading a 3D scene from a file. The file says "create a sphere at position X" and "create a camera at position Y". You need to create objects based on text strings, not hard-coded types.
```cpp
// ❌ Without factory pattern - inflexible and brittle
std::string nodeType = /* read from file */;
if (nodeType == "sphere") {
// You'd need separate sphere creation code
/* somehow create sphere... */
} else if (nodeType == "camera") {
// You'd need separate camera creation code
/* somehow create camera... */
} else if (nodeType == "light") {
// More separate code for each type...
/* somehow create light... */
}
// This approach doesn't scale - imagine 50+ node types!
// ✅ Factory pattern - flexible and extensible
std::string nodeType = /* read from file */;
Node object = scene.createNode(nodeType); // Factory handles ALL types!
// One line of code works for any node type the SDK supports
```
**The key insight:** The factory pattern lets you create objects using data (strings from files, user input, network messages) instead of having to hard-code every possibility.
**Why use a factory?**
- **Flexibility:** You can create objects based on data (like loading from files)
- **Extensibility:** Adding new object types doesn't break existing code
- **Validation:** The factory can check if the requested type exists
- **Initialization:** The factory can set up objects with correct default values
**The factory needs "recipes" first:** Just like a bakery needs to know how to make different cakes before customers can order them, the scene needs to load object definitions before it can create them.
```cpp
// ❌ WRONG: Trying to create nodes without definitions
dl::bella_sdk::Scene scene;
auto sphere = scene.createNode("sphere"); // ERROR: "sphere" type unknown!
// ✅ CORRECT: Load definitions first
dl::bella_sdk::Scene scene;
scene.loadDefs(); // Load the "recipes" for all node types
auto sphere = scene.createNode("sphere"); // SUCCESS: scene knows how to make spheres
```
**What `loadDefs()` actually does:**
- Registers all built-in node types (sphere, pbr, camera, etc.)
- Sets up type validation and parameter checking
- Initializes the internal factory system
- Loads default parameter values for each node type
> **🏗️ Scene Building Pattern:** Always `loadDefs()` first, then create nodes. Think of it as "loading the instruction manual" before trying to build anything.
### Understanding Node Hierarchy: The Mathematics of Scene Organization
3D scenes use hierarchical transformations to solve a fundamental problem: how do you efficiently move, rotate, and scale complex objects made of many parts?
**The Problem:** Imagine animating a walking character. When the torso rotates, the arms should rotate with it. When the upper arm moves, the forearm follows. When the forearm rotates, the hand follows. Doing this manually for every frame would be nightmare!
**The Solution:** Hierarchical transformations. Each node stores its transformation relative to its parent, and the final position is calculated by combining all parent transformations.
```cpp
// Without hierarchy - nightmare to manage
handPosition = torsoTransform * shoulderTransform * upperArmTransform * forearmTransform * handTransform;
// With hierarchy - automatic calculation
hand.parentTo(forearm);
forearm.parentTo(upperArm);
upperArm.parentTo(shoulder);
shoulder.parentTo(torso);
// Now when torso moves, everything follows automatically!
```
**Key Concepts:**
**Local vs World Space:**
- **Local space:** Position relative to parent ("hand is 20cm from wrist")
- **World space:** Absolute position in the scene ("hand is at coordinates 1.5, 2.3, 0.8")
**Transform Accumulation:**
- Child transforms are applied ON TOP OF parent transforms
- Order matters: Parent transform happens first, then child
- This gives you natural, intuitive movement behavior
> **🌳 Transform Chain:** World → Room → Table → Cup. The cup's final position = World × Room × Table × Cup transformations. Move the room, everything inside moves too. This is the power of hierarchical scene graphs!
**node_hierarchy.cpp**
```c++
#include "bella_engine_sdk/src/bella_sdk/bella_scene.h"
int main() {
// Setup scene and get the world root
dl::bella_sdk::Scene scene;
scene.loadDefs();
dl::bella_sdk::Node world = scene.world(); // The root of everything
// ====================================================================
// 🏗️ Create transform nodes (these control position, rotation, scale)
// ====================================================================
auto roomXform = scene.createNode("xform", "room"); // Room positioning
auto tableXform = scene.createNode("xform", "table"); // Table positioning
auto cupXform = scene.createNode("xform", "cup"); // Cup positioning
// ====================================================================
// 🔗 Build hierarchy: world → room → table → cup
// ====================================================================
roomXform.parentTo(world); // Room belongs to world
tableXform.parentTo(roomXform); // Table belongs to room
cupXform.parentTo(tableXform); // Cup belongs to table
// ====================================================================
// 📐 Create transformation matrices (where things are positioned)
// ====================================================================
dl::Mat4 roomTransform = dl::Mat4::makeTranslation(0.0, 0.0, 0.0); // Room at origin
dl::Mat4 tableTransform = dl::Mat4::makeTranslation(0.0, 0.0, -0.05); // Table slightly down
dl::Mat4 cupTransform = dl::Mat4::makeTranslation(0.0, 0.0, 0.025); // Cup slightly up
// ====================================================================
// 🎯 Apply transformations to the transform nodes
// ====================================================================
roomXform["steps"][0]["xform"] = roomTransform; // Room position
tableXform["steps"][0]["xform"] = tableTransform; // Table position (relative to room)
cupXform["steps"][0]["xform"] = cupTransform; // Cup position (relative to table)
// ====================================================================
// 🏺 Add actual geometry (the visible cup shape)
// ====================================================================
auto cupCylinder = scene.createNode("cylinder"); // Create cylinder shape
cupCylinder["height"] = 0.15; // 15cm tall
cupCylinder["radius"] = 0.05; // 5cm radius
cupCylinder.parentTo(cupXform); // Put cylinder in cup's transform
// ====================================================================
// 💾 Save scene to file
// ====================================================================
scene.write("node_hierarchy.bsa");
return 0;
}
```
> **🎯 Key Concept:** The cup's final position = room position + table position + cup position. This is the power of hierarchical transformations!
### Understanding Complete vs Partial Scenes
The example above creates what's called a "partial scene" - it has geometry but is missing the components needed for rendering.
**What makes a scene "complete" for rendering?**
A renderable scene needs these essential components:
1. **Geometry** - The shapes you want to see (✅ we have this)
2. **Camera** - Where you're viewing from (❌ missing)
3. **Lighting** - How the scene is illuminated (❌ missing)
4. **Render Pass** - Instructions for how to generate the image (❌ missing)
**Why save partial scenes?** They're useful for:
- **Modular content creation** - Build objects separately, then import into main scenes
- **Asset libraries** - Reusable geometry that can be used in multiple projects
- **Collaborative workflows** - Different team members work on geometry vs lighting vs cameras
**Working with .bsa files:**
```cpp
// Save geometry-only scene
scene.write("cup_geometry.bsa");
// Later, in a complete scene, import the geometry
dl::bella_sdk::Scene fullScene;
fullScene.loadDefs();
// ... set up camera, lighting, render passes ...
fullScene.import("cup_geometry.bsa"); // Add our cup to the full scene
```
> **💡 Professional Workflow:** In production, you often create assets as partial scenes, then compose them into complete scenes. This separation of concerns makes complex projects much more manageable.
Copyright © 2024 Diffuse Logic, all rights reserved.
## What You Just Learned
Congratulations! You've successfully created and rendered your first 3D scene. Here are the core concepts you now understand:
### 🎯 Bella SDK Concepts
- **Engine**: The rendering powerhouse that creates your images
- **Scene**: Container for all objects and their relationships
- **Nodes**: Individual objects (sphere, disk, materials, camera, etc.)
- **Attributes**: Properties accessed with `node["property"]` syntax
- **Hierarchy**: Objects connected in a tree structure using `parentTo()`
- **Observers**: Event listeners that notify you of rendering progress
### 🔧 C++ Concepts You Used
- **Classes and Objects**: `Engine`, `Scene`, `Node` are all classes
- **Methods**: Functions belonging to objects (like `scene.createNode()`)
- **Auto keyword**: Let the compiler figure out complex types
- **Namespaces**: `dl::bella_sdk::` keeps names organized
- **Inheritance**: `MyEngineObserver` extends `EngineObserver`
- **Overriding**: Custom behavior for `onStarted()`, `onProgress()`, etc.
> **💪 C++ Strength Building:** We're using modern C++ features like `auto` and uniform initialization `{}` to write cleaner code while learning the fundamentals.
## C++ Philosophy for This Guide
This guide follows specific principles to help you become a confident C++ developer:
### ✅ What We Do:
- **Start Simple**: Command-line tools before fancy IDEs
- **Cross-Platform**: Same code works on Linux, MacOS, and Windows
- **Explicit Types First**: Show `dl::bella_sdk::Node` before using `auto`
- **Copy-Paste Ready**: All examples work immediately
- **Gradual Complexity**: Each example builds on the previous
### ❌ What We Avoid:
- **using namespace**: You should always know if you're using std:: or dl::
- **Hidden Complexity**: No magic - we show every step
- **Platform-Specific**: Code that only works on one system
## The Foundation - DL Core Library
Before diving deeper into rendering, let's understand the foundation. The `dl_core` library provides essential utilities that make working with 3D math and data structures easier.
> **🧠 Why Learn This?** Understanding these core types will make you much more effective with the Bella SDK. Plus, these patterns appear in most professional 3D and game development libraries.
**dl_core_basics.cpp**
```text
#include "bella_engine_sdk/src/dl_core/dl_string.h" // Smart strings
#include "bella_engine_sdk/src/dl_core/dl_vector.h" // Dynamic arrays
#include "bella_engine_sdk/src/dl_core/dl_math.h" // 3D math types
#include
int main() {
// ====================================================================
// 📝 Strings: Immutable and Reference-Counted
// ====================================================================
dl::String name = "MyNode"; // Create a string
dl::String fullPath = name + "_001"; // Concatenation works naturally
// ====================================================================
// 📊 Dynamic Arrays: Like std::vector but with math operations
// ====================================================================
dl::ds::Vector values = {1.0, 2.0, 3.0}; // Initialize with list
values.push_back(4.0); // Add element
// ====================================================================
// 🧮 3D Math Types: The Heart of 3D Programming
// ====================================================================
// 3D points and vectors - notice the beautiful brace initialization!
dl::Vec3 position{1.0, 2.0, 3.0}; // A point in 3D space
dl::Vec3 direction{0.0, 0.0, 1.0}; // A direction vector (forward)
dl::Vec3 newPos = position + direction * 2.0; // Move 2 units forward
// Colors with transparency (Red, Green, Blue, Alpha)
dl::Rgba red{1.0, 0.0, 0.0, 1.0}; // Fully opaque red
dl::Rgba transparent = red; // Copy the red
transparent.a = 0.5; // Make it 50% transparent
// ====================================================================
// 🔄 Transformation Matrices: How We Move Things in 3D
// ====================================================================
auto translation = dl::Mat4::makeTranslation(10.0, 0.0, 0.0); // Move right 10 units
dl::Mat4 rotation = dl::Mat4::makeRotationZ(dl::math::nc::pi / 4); // Rotate 45 degrees
dl::Mat4 transform = translation * rotation; // Combine: move then rotate
// ====================================================================
// 📤 Output Results (using .buf() to get C-style string from dl::String)
// ====================================================================
std::cout << "String result: " << fullPath.buf() << std::endl;
std::cout << "Array has " << values.size() << " elements" << std::endl;
std::cout << "New position: {" << newPos.x << ", " << newPos.y << ", " << newPos.z << "}" << std::endl;
std::cout << "Red color: {" << red.r << ", " << red.g << ", " << red.b << ", " << red.a << "}" << std::endl;
return 0;
}
```
### 🎯 C++ Magic: Uniform Initialization with `{}`
See those curly braces `{1.0, 2.0, 3.0}`? That's **uniform initialization** - one of C++11's best features!
#### Before C++11 (the inconsistent mess):
**Problem 1: Different syntax for different things**
```cpp
int x = 5; // Copy initialization
int y(5); // Direct initialization
int z = int(5); // Functional cast
int arr[] = {1, 2, 3}; // Array needs = and {}
std::vector vec; // Can't initialize with values!
```
**Problem 2: The "Most Vexing Parse" - is this a function or variable?**
```cpp
Widget w1(); // Oops! This declares a FUNCTION, not a Widget object
Widget w2; // OK, but can't pass constructor args
Widget w3(10); // OK if constructor takes int
Widget w4(Widget(10)); // ERROR! Compiler thinks this is a function declaration
```
**Problem 3: Narrowing conversions silently lose data**
```cpp
int bad = 3.14; // Silently becomes 3, losing 0.14
char overflow = 300; // Silently overflows (300 > 127)
```
**Problem 4: Containers were painful to initialize**
```cpp
std::vector v;
v.push_back(1);
v.push_back(2);
v.push_back(3); // Really? 3 lines for 3 numbers?
```
**Problem 5: No way to initialize class members in-place**
```cpp
class Scene {
std::vector nodes; // Can't give it initial values here
Matrix4 transform; // Hope default constructor is what you want!
};
```
#### With uniform initialization (everything just works):
**Solution: One syntax for EVERYTHING**
```cpp
int x{5}; // Works
Widget w{10}; // Works (no ambiguity!)
int arr[]{1, 2, 3}; // Works
std::vector vec{1, 2, 3}; // Works (finally!)
```
**No more "Most Vexing Parse"**
```cpp
Widget w1{}; // Empty braces = default construct
Widget w2{10}; // Pass arguments
Widget w3{Widget{10}}; // Even this works!
```
**Narrowing conversions are ERRORS**
```cpp
int safe{3.14}; // COMPILE ERROR - won't lose data
char no_overflow{300}; // COMPILE ERROR - prevents bugs
```
**Containers initialize naturally**
```cpp
std::vector v{1, 2, 3}; // One beautiful line
std::map m{{"a", 1}, {"b", 2}}; // Even nested!
```
**Initialize members right in the class**
```cpp
class Scene {
std::vector nodes{}; // Start with empty vector
Matrix4 transform{1,0,0,0, // Identity matrix right here!
0,1,0,0,
0,0,1,0,
0,0,0,1};
};
```
#### The killer feature - it catches bugs at compile time:
**Old way - these bugs compile but crash/corrupt at runtime**
```cpp
void processArray(int arr[10]) { /* ... */ }
int small[3] = {1, 2, 3};
processArray(small); // CRASH! But compiles fine
double pi = 3.14159;
int bad_pi = pi; // Silently becomes 3
float* oops = pi; // Compiles on some compilers!
```
**New way - bugs caught at compile time**
```cpp
std::array arr{1,2,3}; // Size is part of type
int good_pi{pi}; // ERROR: narrowing conversion
float* correct{pi}; // ERROR: can't convert double to pointer
```
**Why it's awesome:**
- 🎯 **One syntax for everything** - no more remembering different rules
- 🛡️ **Prevents silent bugs** - narrowing conversions become compile errors
- 🚀 **Fixes parsing ambiguities** - no more "Most Vexing Parse"
- 📖 **Super readable** - `{}` always means "initialize this"
- ✨ **Works everywhere** - variables, arrays, containers, member initialization
**Pro tip:** When in doubt, use `{}` - it's safer and clearer than any alternative!
## Building Your First Scene: Uniform Initialization in Action
Now let's use those types to build something real - a Bella scene that we can save and load! This example shows uniform initialization working in a practical 3D context.
**build_scene.cpp**
```c++
#include "bella_engine_sdk/src/bella_sdk/bella_scene.h"
#include "bella_engine_sdk/src/dl_core/dl_logging.h"
int main() {
// Create scene and load node definitions
dl::bella_sdk::Scene scene;
scene.loadDefs();
dl::bella_sdk::Node world = scene.world();
// ====================================================================
// 🎨 Create Materials with Uniform Initialization
// ====================================================================
// Shiny metal material - notice the clean {} syntax
auto metalMaterial = scene.createNode("conductor");
metalMaterial["reflectance"] = dl::Rgba{0.9, 0.7, 0.1, 1.0}; // Golden color
metalMaterial["roughness"] = dl::Real{15.0}; // Fairly smooth
// Matte plastic material
auto plasticMaterial = scene.createNode("dielectric");
plasticMaterial["color"] = dl::Rgba{0.2, 0.8, 0.3, 1.0}; // Green plastic
plasticMaterial["roughness"] = dl::Real{85.0}; // Rough surface
// ====================================================================
// 🏀 Create Spheres at Different Positions
// ====================================================================
// Metal sphere on the left - using transformation matrices
auto leftSphereXform = scene.createNode("xform");
leftSphereXform["material"] = metalMaterial;
leftSphereXform.parentTo(world);
// Create translation matrix
dl::Mat4 leftTransform = dl::Mat4::makeTranslation(-2.0, 0.0, 0.0); // STATIC METHOD: called on class name
leftSphereXform["steps"][0]["xform"] = leftTransform;
auto leftSphere = scene.createNode("sphere");
leftSphere["radius"] = dl::Real{1.0};
leftSphere.parentTo(leftSphereXform); // INSTANCE METHOD: called on specific object
// Plastic sphere on the right
auto rightSphereXform = scene.createNode("xform");
rightSphereXform["material"] = plasticMaterial;
rightSphereXform.parentTo(world);
// Different transformation - combining translation and scaling
dl::Mat4 translation = dl::Mat4::makeTranslation(2.0, 0.0, 0.0); // Move right 2 units
dl::Mat4 scaling = dl::Mat4::makeScale(1.5, 1.5, 1.5); // Make 50% bigger
dl::Mat4 rightTransform = translation * scaling; // Combine transformations
rightSphereXform["steps"][0]["xform"] = rightTransform;
auto rightSphere = scene.createNode("sphere");
rightSphere["radius"] = dl::Real{1.0}; // Same base size, but transform scales it
rightSphere.parentTo(rightSphereXform);
// ====================================================================
// 🏛️ Create Ground Plane
// ====================================================================
auto groundMaterial = scene.createNode("dielectric");
groundMaterial["tranmittance"] = dl::Rgba{0.8, 0.8, 0.8, 1.0}; // Light gray
groundMaterial["roughness"] = dl::Real{45.0};
auto groundXform = scene.createNode("xform");
groundXform["material"] = groundMaterial;
groundXform.parentTo(world);
// Position ground plane below the spheres
dl::Mat4 groundTransform = dl::Mat4::makeTranslation(0.0, 0.0, -1.0); // Move down 1 unit
groundXform["steps"][0]["xform"] = groundTransform;
auto ground = scene.createNode("disk");
ground["radius"] = dl::Real{8.0}; // Large ground plane
ground.parentTo(groundXform);
// ====================================================================
// 💾 Save Scene to File
// ====================================================================
scene.write("two_spheres_scene.bsa");
dl::logInfo("✅ Scene saved as 'two_spheres_scene.bsa'");
dl::logInfo("📊 Scene contains:");
dl::logInfo(" - Golden metal sphere (left side)");
dl::logInfo(" - Green plastic sphere (right side, 1.5x larger)");
dl::logInfo(" - Gray ground plane");
dl::logInfo("💡 Import this .bsa file into Bella GUI to render it!");
dl::logInfo("💡 This scene only creates the geometry, so without lights and cameras it will look black.");
dl::logInfo("💡 You can add lights and cameras to the scene in the GUI, or as we mentioned earlier, by importing the .bsa");
dl::logInfo("💡 When you do a File New in Bella GUI, you get a default scene with a camera and a light.");
dl::logInfo("💡 Hit the IPR to render the scene, and hit the E key to zoom out.");
return 0;
}
```
**Build and run:**
```bash
# Linux/macOS
g++ -std=c++14 -DNDEBUG -Ibella_engine_sdk/src -Lbella_engine_sdk/lib -Wl,-rpath,bella_engine_sdk/lib build_scene.cpp -lbella_engine_sdk -o build_scene
./build_scene
# Windows
cl /std:c++14 /DNDEBUG /Ibella_engine_sdk\src /EHsc build_scene.cpp /link /LIBPATH:bella_engine_sdk\lib bella_engine_sdk.lib /OUT:build_scene.exe
build_scene.exe
```
**What you should see:**
```
✅ Scene saved as 'two_spheres_scene.bsa'
📊 Scene contains:
- Golden metal sphere (left side)
- Green plastic sphere (right side, 1.5x larger)
- Gray ground plane
💡 Import this .bsa file into Bella GUI to render it!
```
### Static vs Instance Method Calls
You probably noticed two different ways of calling methods in the code above:
**Static Method Call:**
```cpp
dl::Mat4::makeTranslation(-2.0, 0.0, 0.0) // Called on CLASS name (Mat4)
```
- Uses the **class name** (`Mat4`) followed by `::`
- No object needed - the method belongs to the class itself
- Like a utility function organized under the class name
- Common for creating new objects or doing calculations that don't need specific object data
**Instance Method Call:**
```cpp
leftSphere.parentTo(leftSphereXform) // Called on SPECIFIC OBJECT (leftSphere)
```
- Uses a **specific object** (`leftSphere`) followed by `.`
- The method operates on that particular object's data
- Most methods you'll use are instance methods
- They modify or use the data inside that specific object
**Think of it like:**
- **Static method:** "Hey Mat4 class, make me a translation matrix"
- **Instance method:** "Hey leftSphere object, parent yourself to this transform"
> **💡 Quick Rule:** If you see `ClassName::methodName()` it's static. If you see `objectName.methodName()` it's instance.
### Key Concepts Demonstrated
**🎯 Uniform Initialization in Practice:**
- `dl::Rgba{0.9, 0.7, 0.1, 1.0}` - Clean color specification using `{}`
- `dl::Real{15.0}` - Consistent numeric types using `{}`
- `dl::Mat4::makeScale(1.5, 1.5, 1.5)` - Factory methods with clear parameters (not uniform initialization, but clean syntax)
**🔄 Matrix Mathematics:**
- **Translation matrices:** Moving objects in 3D space
- **Scale matrices:** Changing object size
- **Matrix multiplication:** Combining transformations (`translation * scaling`)
**🏗️ Scene Organization:**
- **Materials:** Define surface properties (metal vs plastic)
- **Transforms:** Control object positioning and scaling
- **Geometry:** The actual 3D shapes
- **Hierarchy:** Everything properly parented to build a scene graph
> **💡 Real-World Usage:** This pattern (create materials, create transforms, apply materials to transforms, add geometry) is the foundation of all 3D scene construction. You're learning the core workflow used in every 3D application!
## Understanding Types in C++: Memory, Performance, and Safety
Types in C++ aren't just labels - they're fundamental to how your program uses memory and performs. This is especially critical in 3D rendering where you're processing millions of vertices, pixels, and transformations.
### Types Control Memory Layout
Every type defines exactly how much memory it uses and how that memory is organized:
```cpp
// Built-in types - precise memory footprint
int count = 42; // Exactly 4 bytes
float precision = 3.14f; // Exactly 4 bytes
double bigPrecision = 3.14; // Exactly 8 bytes
bool flag = true; // Usually 1 byte
// 3D types - optimized memory layout
dl::Vec3 position{1.0, 2.0, 3.0}; // 3 × 8 bytes = 24 bytes, packed tight
dl::Vec4 homogeneous{1,2,3,1}; // 4 × 8 bytes = 32 bytes, aligned for SIMD
dl::Mat4 transform = /* ... */; // 16 × 8 bytes = 128 bytes, column-major
```
> **⚡ Performance Insight:** `Vec4` uses 32 bytes instead of 24 because modern CPUs can process 4 floats simultaneously (SIMD). The "wasted" 8 bytes actually makes math operations much faster.
### Stack vs Heap: Where Your Data Lives
C++ gives you control over where data is stored in memory, which dramatically affects performance. Understanding this is crucial for writing efficient 3D applications.
**What are the Stack and Heap?** They're two different areas of your computer's memory (RAM) where your program can store data, each with different characteristics.
**The Stack - Fast and Automatic:**
Think of the stack like a cafeteria tray stack - you can only add or remove trays from the top. It's extremely fast but limited in size.
```cpp
void someFunction() {
dl::Vec3 position{1, 2, 3}; // Created on stack when function starts
dl::Mat4 transform = /* ... */; // Also on stack
// When function ends, position and transform are automatically destroyed
// No memory management needed - it's automatic!
}
```
**Stack characteristics:**
- **Lightning fast:** Allocation is just moving a pointer
- **Automatic cleanup:** Variables destroyed when leaving scope (function ends, block ends)
- **Limited size:** Usually ~1-8MB total (varies by system)
- **LIFO order:** Last In, First Out (like the tray stack)
**The Heap - Flexible but Slower:**
Think of the heap like a huge warehouse where you can store boxes anywhere, but you need to keep track of where you put them.
```cpp
void someFunction() {
// Ask for space in the heap - slower, but you control the size
dl::Vec3* positions = new dl::Vec3[1000000]; // 1 million vectors!
// Use the data...
// YOU must clean up - the heap doesn't do it automatically
delete[] positions; // If you forget this = memory leak!
}
```
**Heap characteristics:**
- **Flexible size:** Can allocate huge amounts (limited by available RAM)
- **Manual management:** You must `delete` what you `new`
- **Slower access:** More complex allocation algorithm
- **Fragmentation:** Can become scattered over time, affecting performance
**Why This Matters for 3D Programming:**
```cpp
// ✅ Stack - perfect for small, temporary data
dl::Vec3 cameraPosition{0, 5, 10}; // 24 bytes - fits easily on stack
dl::Mat4 viewMatrix = camera.getView(); // 128 bytes - still fine for stack
// ❌ Stack - dangerous for large data
dl::Vec3 millionVertices[1000000]; // 24MB! Likely stack overflow crash
// ✅ Heap - perfect for large, dynamic data
auto vertices = std::make_unique(vertexCount); // Any size, automatic cleanup
```
**Stack allocation (fast, automatic cleanup):**
```cpp
dl::Vec3 cameraPos{0, 0, 5}; // Lives on stack - super fast access
dl::Mat4 viewMatrix = /* ... */; // Also stack - perfect for small, short-lived data
```
**Heap allocation (flexible but slower):**
```cpp
// When you need dynamic size or long lifetime
auto* vertices = new dl::Vec3[vertexCount]; // Heap - you control the size
// Don't forget: delete[] vertices; // Manual cleanup required!
```
### Why Strong Typing Prevents Expensive Mistakes
In 3D graphics, type mistakes aren't just bugs - they're performance killers:
```cpp
// ❌ EXPENSIVE MISTAKE: Wrong precision
float lowPrecision = 3.14159265359; // Loses precision, causes visual artifacts
double highPrecision = 3.14159265359; // Correct precision for math
// ❌ EXPENSIVE MISTAKE: Wrong vector size
dl::Vec3 position{1, 2, 3};
// someFunction(position); // Error if function expects Vec4!
// Would require expensive conversion: Vec4{position.x, position.y, position.z, 1.0}
// ✅ CORRECT: Right types from the start
dl::Vec4 homogeneousPos{1, 2, 3, 1}; // Ready for matrix multiplication
```
### Bella SDK's Type Philosophy
The Bella SDK uses types strategically for both safety and performance:
```cpp
dl::Real precision = 42.0; // Consistent precision across the SDK
dl::String name = "MyNode"; // Reference-counted, no accidental copies
dl::ds::Vector vertices; // Dynamic array optimized for 3D data
dl::Rgba color{0.8, 0.6, 0.2, 1.0}; // Exactly what GPU expects: 4 floats
```
> **🧠 Professional Insight:** In production 3D software, choosing the right types can mean the difference between 30 FPS and 60 FPS. The SDK's types are designed by experts who understand both the math and the hardware.
## Type Safety and Conversions
Now that you understand types, let's see how Bella's type system prevents errors while allowing natural conversions. This is crucial for 3D programming where you frequently convert between 2D/3D vectors and different coordinate systems.
> **🔒 C++ Safety:** Strong typing prevents bugs like accidentally using a 2D point where a 3D point is expected. But the SDK provides elegant ways to convert between types when needed.
**type_conversions.cpp**
```c++
#include "bella_engine_sdk/src/dl_core/dl_vector.h"
#include "bella_engine_sdk/src/dl_core/dl_math.h"
#include
int main() {
// ====================================================================
// 🔄 Type Conversions: The SDK gives you options!
// ====================================================================
// Start with a simple scalar (single number)
dl::Real scalar = 5.0;
// Create a 3D vector - uniform initialization makes this clean
dl::Vec3 vector = {scalar, scalar, scalar}; // {5.0, 5.0, 5.0}
// ====================================================================
// 📈 Vec3 to Vec4: Two approaches (both valid!)
// ====================================================================
// Method 1: Explicit type casting (tells compiler "I know what I'm doing")
dl::Vec4 vec4_cast = static_cast(vector);
// Method 2: Component construction (explicit about what goes where)
dl::Vec4 vec4_construct = {vector.x, vector.y, vector.z, 0.0};
// ====================================================================
// 🔢 Matrix Identity: The "do nothing" transformation
// ====================================================================
dl::Mat3 small = dl::Mat3::identity; // 3x3 identity matrix
dl::Mat4 large = dl::Mat4::identity; // 4x4 identity matrix
// ====================================================================
// 📉 Vec4 to Vec3: Dropping the 4th component
// ====================================================================
dl::Vec4 source = {1.0, 2.0, 3.0, 4.0};
// Method 1: Type casting (automatic - drops .w component)
dl::Vec3 result_cast = static_cast(source);
// Method 2: Manual component selection (explicit control)
dl::Vec3 result_construct = {source.x, source.y, source.z};
// ====================================================================
// 📤 Show the results
// ====================================================================
std::cout << "Scalar value: " << scalar << std::endl;
std::cout << "Vec3: {" << vector.x << ", " << vector.y << ", " << vector.z << "}" << std::endl;
std::cout << "Vec4 (cast): {" << vec4_cast.x << ", " << vec4_cast.y << ", " << vec4_cast.z << ", " << vec4_cast.w << "}" << std::endl;
std::cout << "Vec4 (construct): {" << vec4_construct.x << ", " << vec4_construct.y << ", " << vec4_construct.z << ", " << vec4_construct.w << "}" << std::endl;
std::cout << "Back to Vec3 (cast): {" << result_cast.x << ", " << result_cast.y << ", " << result_cast.z << "}" << std::endl;
std::cout << "Back to Vec3 (construct): {" << result_construct.x << ", " << result_construct.y << ", " << result_construct.z << "}" << std::endl;
return 0;
}
```
### Understanding Casting: When and Why to Convert Types
In 3D programming, you constantly need to convert between related types - like going from 3D to 2D coordinates, or between different precision levels. C++ gives you several ways to do this safely.
**What is casting?** It's telling the compiler "I want to convert this data from one type to another." Think of it like converting units: turning meters into feet, or Celsius into Fahrenheit.
**Why do we need it?** Different parts of your 3D pipeline expect different data formats:
- GPU shaders might want `Vec4` for matrix operations
- Screen coordinates need `Vec2` for 2D positioning
- File formats might require `float` instead of `double`
```cpp
// Common 3D casting scenarios
dl::Vec3 worldPos{100.0, 200.0, 50.0};
// Scenario 1: 3D world position → 2D screen position
dl::Vec2 screenPos{worldPos.x, worldPos.y}; // Manual component selection
// Scenario 2: Adding homogeneous coordinate for matrix math
dl::Vec4 homogeneousPos = static_cast(worldPos); // Automatic: adds w=1.0
// Scenario 3: Precision conversion for file export
float exportData = static_cast(worldPos.x); // double → float
```
**Two conversion strategies:**
**`static_cast<>()` - "Do the standard conversion"**
- Let the type system handle the conversion automatically
- Good when the conversion is well-defined and expected
- Example: `Vec3` → `Vec4` automatically sets `w=1.0`
**Component construction `{x, y, z}` - "I'll specify exactly what goes where"**
- You control every detail of the conversion
- Good when you need non-standard behavior
- Example: `Vec4{pos.x, pos.y, pos.z, 0.0}` for direction vectors (w=0.0, not 1.0)
> **💡 When to Use Each:**
> - Use `static_cast<>()` when the "default" conversion does what you want
> - Use `{component, construction}` when you need precise control over the result
> - When in doubt, component construction is more explicit and often clearer to read
## Working with Scenes and Nodes
### Creating Your First Scene
Now that you understand the core types, let's see how to build scenes step by step:
**scene_basics.cpp**
```c++
#include "bella_engine_sdk/src/bella_sdk/bella_scene.h"
#include "bella_engine_sdk/src/dl_core/dl_logging.h"
int main() {
// Step 1: Every scene needs node definitions first
dl::bella_sdk::Scene scene;
scene.loadDefs(); // Load built-in Bella node types (sphere, pbr, lights, etc.)
// Step 2: Now you can create nodes
dl::bella_sdk::Node sphere = scene.createNode("sphere"); // 3D sphere geometry
dl::bella_sdk::Node material = scene.createNode("pbr"); // Physically-based material
dl::bella_sdk::Node light = scene.createNode("physicalSky"); // Realistic sky lighting
// Step 3: Nodes have both a type and a unique auto-generated name
dl::logInfo("Created %s node named '%s'",
sphere.type().buf(), // The type: "sphere"
sphere.id().buf() // Auto-generated unique ID like "sphere_001"
);
return 0;
}
```
### The Scene Creation Lifecycle
Understanding the proper order of scene creation prevents frustrating errors and helps you write more reliable code.
**Why does order matter?** The Bella SDK uses something called the **factory pattern** - a common programming solution for creating objects.
**What's a "pattern" in programming?** Think of patterns like blueprints for solving common problems. Just like architects have standard ways to design kitchens or staircases, programmers have standard ways to solve problems like "how do I create different types of objects based on a string name?"
**The Factory Pattern Explained:**
The problem: How do you create different objects when you don't know what type you need until runtime?
**Scenario:** You're loading a 3D scene from a file. The file says "create a sphere at position X" and "create a camera at position Y". You need to create objects based on text strings, not hard-coded types.
```cpp
// ❌ Without factory pattern - inflexible and brittle
std::string nodeType = /* read from file */;
if (nodeType == "sphere") {
// You'd need separate sphere creation code
/* somehow create sphere... */
} else if (nodeType == "camera") {
// You'd need separate camera creation code
/* somehow create camera... */
} else if (nodeType == "light") {
// More separate code for each type...
/* somehow create light... */
}
// This approach doesn't scale - imagine 50+ node types!
// ✅ Factory pattern - flexible and extensible
std::string nodeType = /* read from file */;
Node object = scene.createNode(nodeType); // Factory handles ALL types!
// One line of code works for any node type the SDK supports
```
**The key insight:** The factory pattern lets you create objects using data (strings from files, user input, network messages) instead of having to hard-code every possibility.
**Why use a factory?**
- **Flexibility:** You can create objects based on data (like loading from files)
- **Extensibility:** Adding new object types doesn't break existing code
- **Validation:** The factory can check if the requested type exists
- **Initialization:** The factory can set up objects with correct default values
**The factory needs "recipes" first:** Just like a bakery needs to know how to make different cakes before customers can order them, the scene needs to load object definitions before it can create them.
```cpp
// ❌ WRONG: Trying to create nodes without definitions
dl::bella_sdk::Scene scene;
auto sphere = scene.createNode("sphere"); // ERROR: "sphere" type unknown!
// ✅ CORRECT: Load definitions first
dl::bella_sdk::Scene scene;
scene.loadDefs(); // Load the "recipes" for all node types
auto sphere = scene.createNode("sphere"); // SUCCESS: scene knows how to make spheres
```
**What `loadDefs()` actually does:**
- Registers all built-in node types (sphere, pbr, camera, etc.)
- Sets up type validation and parameter checking
- Initializes the internal factory system
- Loads default parameter values for each node type
> **🏗️ Scene Building Pattern:** Always `loadDefs()` first, then create nodes. Think of it as "loading the instruction manual" before trying to build anything.
### Understanding Node Hierarchy: The Mathematics of Scene Organization
3D scenes use hierarchical transformations to solve a fundamental problem: how do you efficiently move, rotate, and scale complex objects made of many parts?
**The Problem:** Imagine animating a walking character. When the torso rotates, the arms should rotate with it. When the upper arm moves, the forearm follows. When the forearm rotates, the hand follows. Doing this manually for every frame would be nightmare!
**The Solution:** Hierarchical transformations. Each node stores its transformation relative to its parent, and the final position is calculated by combining all parent transformations.
```cpp
// Without hierarchy - nightmare to manage
handPosition = torsoTransform * shoulderTransform * upperArmTransform * forearmTransform * handTransform;
// With hierarchy - automatic calculation
hand.parentTo(forearm);
forearm.parentTo(upperArm);
upperArm.parentTo(shoulder);
shoulder.parentTo(torso);
// Now when torso moves, everything follows automatically!
```
**Key Concepts:**
**Local vs World Space:**
- **Local space:** Position relative to parent ("hand is 20cm from wrist")
- **World space:** Absolute position in the scene ("hand is at coordinates 1.5, 2.3, 0.8")
**Transform Accumulation:**
- Child transforms are applied ON TOP OF parent transforms
- Order matters: Parent transform happens first, then child
- This gives you natural, intuitive movement behavior
> **🌳 Transform Chain:** World → Room → Table → Cup. The cup's final position = World × Room × Table × Cup transformations. Move the room, everything inside moves too. This is the power of hierarchical scene graphs!
**node_hierarchy.cpp**
```c++
#include "bella_engine_sdk/src/bella_sdk/bella_scene.h"
int main() {
// Setup scene and get the world root
dl::bella_sdk::Scene scene;
scene.loadDefs();
dl::bella_sdk::Node world = scene.world(); // The root of everything
// ====================================================================
// 🏗️ Create transform nodes (these control position, rotation, scale)
// ====================================================================
auto roomXform = scene.createNode("xform", "room"); // Room positioning
auto tableXform = scene.createNode("xform", "table"); // Table positioning
auto cupXform = scene.createNode("xform", "cup"); // Cup positioning
// ====================================================================
// 🔗 Build hierarchy: world → room → table → cup
// ====================================================================
roomXform.parentTo(world); // Room belongs to world
tableXform.parentTo(roomXform); // Table belongs to room
cupXform.parentTo(tableXform); // Cup belongs to table
// ====================================================================
// 📐 Create transformation matrices (where things are positioned)
// ====================================================================
dl::Mat4 roomTransform = dl::Mat4::makeTranslation(0.0, 0.0, 0.0); // Room at origin
dl::Mat4 tableTransform = dl::Mat4::makeTranslation(0.0, 0.0, -0.05); // Table slightly down
dl::Mat4 cupTransform = dl::Mat4::makeTranslation(0.0, 0.0, 0.025); // Cup slightly up
// ====================================================================
// 🎯 Apply transformations to the transform nodes
// ====================================================================
roomXform["steps"][0]["xform"] = roomTransform; // Room position
tableXform["steps"][0]["xform"] = tableTransform; // Table position (relative to room)
cupXform["steps"][0]["xform"] = cupTransform; // Cup position (relative to table)
// ====================================================================
// 🏺 Add actual geometry (the visible cup shape)
// ====================================================================
auto cupCylinder = scene.createNode("cylinder"); // Create cylinder shape
cupCylinder["height"] = 0.15; // 15cm tall
cupCylinder["radius"] = 0.05; // 5cm radius
cupCylinder.parentTo(cupXform); // Put cylinder in cup's transform
// ====================================================================
// 💾 Save scene to file
// ====================================================================
scene.write("node_hierarchy.bsa");
return 0;
}
```
> **🎯 Key Concept:** The cup's final position = room position + table position + cup position. This is the power of hierarchical transformations!
### Understanding Complete vs Partial Scenes
The example above creates what's called a "partial scene" - it has geometry but is missing the components needed for rendering.
**What makes a scene "complete" for rendering?**
A renderable scene needs these essential components:
1. **Geometry** - The shapes you want to see (✅ we have this)
2. **Camera** - Where you're viewing from (❌ missing)
3. **Lighting** - How the scene is illuminated (❌ missing)
4. **Render Pass** - Instructions for how to generate the image (❌ missing)
**Why save partial scenes?** They're useful for:
- **Modular content creation** - Build objects separately, then import into main scenes
- **Asset libraries** - Reusable geometry that can be used in multiple projects
- **Collaborative workflows** - Different team members work on geometry vs lighting vs cameras
**Working with .bsa files:**
```cpp
// Save geometry-only scene
scene.write("cup_geometry.bsa");
// Later, in a complete scene, import the geometry
dl::bella_sdk::Scene fullScene;
fullScene.loadDefs();
// ... set up camera, lighting, render passes ...
fullScene.import("cup_geometry.bsa"); // Add our cup to the full scene
```
> **💡 Professional Workflow:** In production, you often create assets as partial scenes, then compose them into complete scenes. This separation of concerns makes complex projects much more manageable.
Copyright © 2024 Diffuse Logic, all rights reserved.